Applying Floor Finish
Objective:
Applying multiple coats of floor finish to help protect floors & vinyl surfaces.
SUPPLIES & EQUIPMENT NEEDED:
1
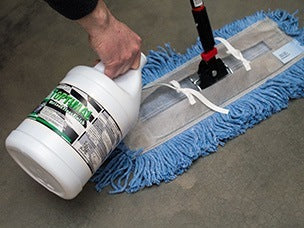
Prep the Area & Equipment -
If you're using a wax applicator mop that has looped ends, like our nylon looped wax applicator mop, we recommend lining your mop bucket with a garbage bag, just like in the 1st step of our stripping a floor instructions. This will keep the floor finish from entering the mop bucket and eliminate the possibility of a foreign substance or unwanted chemical from getting into the finish or on the floor. It will also eliminate another clean up step once you've finished applying all the layers of floor finish. If you are using a flat wax applicator mop that looks like a dust mop, like our 18" floor finish flat wax mop, there are no preparation steps. Set up all necessary caution/wet floor/restroom closed floor signs. Isolate or close off any area that will have wax applied to it. You cannot have any traffic through this area until all coats are completely dried. If the floor surface area that is going to be refinished, is not completely dry, you'll need to set up several 3-speed floor dryers on low to dry all surfaces thoroughly. You want the finish to dry, but with air movement that isn’t high enough to ripple the floor finish as it dries. If they are not 100% dry, the new coats of floor finish will not set or cure properly.
2
Applying 1st Coat of Wax -
The first thing you'll need to do is grab your wax, read the label, and calculate the amount of square footage that needs to be refinished. Always make sure to have more wax on hand than is necessary. You do not want to run out of wax before the job is finished. Most wax finishes, like our 'Ideal Premium' Wet Look Floor Finish will cover approximately 2,000 square feet per gallon. Each finish is different, but most recommend 4 to 5 coats. For example, 1 gallon of Optimal would provide 5 coats on a 20' x 20' (400 ft²) room.
If you're using a flat wax mop, you can simply pour the wax in a thin bead into the open back of the mop. For looped end wax mops, we recommend dipping it into the wax in your bucket, and slightly wringing it out, so the mop is damp, not drenched and dripping with the floor finish. Apply a THIN, and we emphasize THIN, coat of finish to the floor. If the first layer is too thick, the finish can adhere, or cure improperly, and the rest of the coats will be ruined. This will require you to strip off what you just laid down, and start over.The most effective way to apply finish throughout a room is to start at the entranceway and outline the room, running along the baseboards. You'll then do a 180° turn back at the 3rd wall, and fill in the rest of the area by working in a back and forth pattern until you work your way out the door (See image below). This not only provides complete coverage, but it is the most efficient way to apply finish in a room without ever doubling up and walking over an area you've already finished. A 15 - 25% overlap is common to ensure no areas are missed. If any finish is splashed onto the baseboards or surrounding objects, it should be removed immediately. If not removed immediately, removal later can be a lengthy and tedious process. The 1st coat must be allowed to completely dry before applying the subsequent coats. About 20 - 30 minutes is typically a good amount of time to let each coat dry before starting the next coat of finish. You’ll always want to do a touch test to see if the finish feels tacky before applying the next coat. Even with 20-30 minutes transpired, the variables are numerous enough that you’ll need to test.
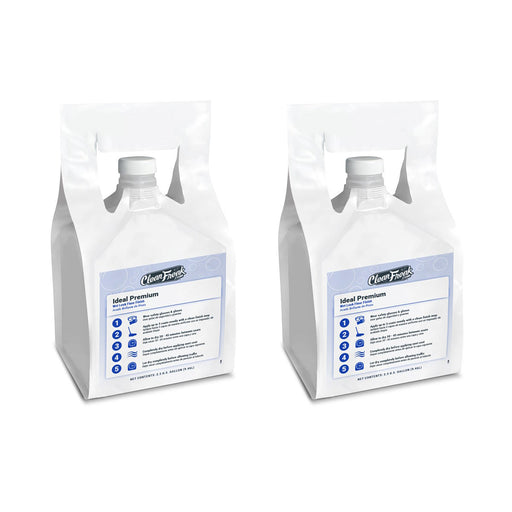
CleanFreak® 'Ideal Premium' Wet Look Floor Finish (2.5 Gallon FlexMax™ Pouch) - Case of 2
SKU:MPL-1524-225P
Original price
$114.99
-
Original price
$114.99
Original price
$114.99
$114.99
-
$114.99
Current price
$114.99
CleanFreak 'Ideal Premium' is a floor finish that provides a brilliant wet look appearance, and can be used to protect and prolong the life of viny...
View full detailsOriginal price
$114.99
-
Original price
$114.99
Original price
$114.99
$114.99
-
$114.99
Current price
$114.99
3
Applying Additional Coats of Wax -
Repeat the above instructions by following the below diagram after allowing the previous coat to completely dry. The more thin coats you put down, the more protection you'll provide for the floor and the less you'll have to strip and refinish further down the road. It is a good idea to allo w as much time as possible for all the coats to cure and adhere before allowing foot traffic across the floor. Typically 8 hours of curing is adequate before opening it up to the public. 72 hours is the recommended time for fresh finish to cure prior to burnishing.

4
Clean Up -
If there are several jobs that need refinishing over the next few days, you can simply take your mop and tie it off inside a garbage bag. This will create a sealed environment so the mop will stay damp and not dry out. If you are finished applying wax, you can simply rinse the mop out for a few minutes until all the finish has been removed from the mop head. Allow mop to drip dry away from walls and other objects. Laundering is not necessary. Wash out and thoroughly clean all other objects and equipment that may have come in contact with the wax. If wax is allowed to dry on or in them, it will be nearly impossible to remove later.
Ready to make your floor shiny? Continue at Burnishing a Floor.
- Limit up to $50,000
- Terms up to 12 months
Click here to check out our Credit Key plan.
- Limit up to $1,000,000
- Terms up to 60 months
Click here to check out our EquipMoney plans.
- Limit up to $17,500
- Terms up to 12 months
Click here to check out our ShopPay plans.
To finance through ShopPay, simply add the items you wish to finance to your cart and click on the
In the new ShopPay checkout, select "Pay in monthly installments" as your payment options and fill in the rest of the info to apply.
Enter the loan amount below for your estimate and click the button to apply for credit today!
- Limit up to $50,000
- Terms up to 12 months
- No prepayment penalties
- Instant Approval
- 30 days interest free
Enter the loan amount below for your estimate and click the button to apply for credit today!
- Terms up to 60 months
- No prepayment penalties
- Instant approval with no hard credit pulls
- All credits welcome – including start-ups
- Business accounts only
Enter the loan amount below for your estimate and click the button to apply for credit today!
- 3, 6, 12 month payment options
- For orders between $150 and $17,500 with a 0% - 36% APR interest rate**
- Checking eligibility has no impact to credit


